Are you new to the roofing industry or just starting your own roofing business? If so, you know that there are hundreds of details to take care of before you’re truly ready for business. But perhaps one of the most important to your bottom line is understanding how to accurately calculate necessary materials.
This is why it’s essential to understand what a roofing square is. This roofing industry standard can help you on the job. Once you know how roofing squares work, giving clients estimates is much easier.
Overall, your roofing business will benefit from the efficiency and increased profitability of using roofing squares.
What Is a Roofing Square?
A roofing square is not a physical tool. Nor is it a square foot or square yard.
A roofing square equals the amount of roofing material needed to cover 100 square feet, including overlap of shingles or tiles (aka headlap). It’s not exactly 100 square feet, but it’s close.
Why was this unit of measurement created?
When you think about the size of most roofs, the standard of a roofing square makes sense. Measuring something as large as a roof in small units gets cumbersome.
Think of it like paying for your groceries with $20 bills instead of pennies or nickels. Isn’t it easier to work with larger denominations? Segmenting the roof area into larger chunks, like roofing squares, makes it easier to get projects done quickly and with less hassle.
First, it’s easier to put together an estimate for a customer.
Second, it’s simple for the roofer to purchase the necessary materials, like underlayment and shingles. You always want to have the correct amount of roofing supplies available.
Remember, anything that contributes to the efficiency of your operation affects your bottom line.
You can’t bill for creating estimates or pulling materials. Calculating roofing squares reduces unbillable time, so you can apply that to jobs. That’s where you make money and grow profits.
RELATED ARTICLE: The Parts of a Roof: A Comprehensive Guide for Roofers

Roofing Squares in Practice
Now that you understand what a roofing square is, we can demonstrate how to use this measurement on projects. We’ll also discuss costs, including factors that affect roofing estimates.
But first, let’s review the math.
How To Calculate Roofing Jobs Using Roofing Squares
To estimate a roofing job using roofing squares, start with these steps:
- Using a tape measure, measure the length and width of each roof segment (aka plane).
- Multiply each plane’s length and width to get its square footage.
- Add the square footage totals together.
Now convert the square footage to roofing squares by dividing the total square footage by 100.
For example, if your total roof is 2,000 square feet, it is considered a 20 square roof. Dividing 2,000 by 100 equals 20.
There’s one more essential factor—pitch.
It takes more roofing material to cover a steeply pitched roof than a flat one. So, you must add coverage based on the roof’s pitch (rise over run, similar to stairs).
For example, a roof with a 5/12 pitch requires 9% more roofing material than a flat roof. A roof with a 9/12 pitch takes considerably more: 25%.
How do you determine the pitch?
- Go to the peak of the roof.
- Extend a two-foot level horizontally outward from the peak.
- Align the level’s bubble with the exact center of the indicator glass.
- Use a tape measure to see how many inches lie between the 12-inch mark on the level and the roof. A 6-inch drop would be a 6/12 roof pitch.
Most roofers assign the pitch to one of three categories:
- Low pitch = 1/12 to 3/12
- Medium pitch = 4/14 to 9/12
- High pitch = 10/12 and higher
The last step is multiplying your roofing squares by a roof pitch multiplier. The easiest way to get this multiplier is to refer to an online roof pitch calculator like this one.
Experienced roofers can often eyeball this, but when you’re starting out, it’s best to measure. Also, if you’re an employee of a roofing company, they may have slightly different factors used in calculating roofing area with pitch. So, use their numbers to be consistent with their practices.
Common Roofing Materials and Their Rates Per Square
Roofing materials can vary widely in price based on several factors:
- Your location
- Popularity and demand
- Quality of the material
- Expected lifespan
- General market going price
- Delays or availability
If you use certain roofing materials frequently, you might get a discount for buying them in bulk, knowing you’ll use them soon.
That said, you can expect to pay roughly within the ranges below for roofing materials.
- Asphalt shingles: $80 to $130
- Architectural/dimensional shingles: $100 to $250
- Metal: $100 to $800
- Tile: $300 to $2,500
- Wood shakes: $300 to $700
- Slate/stone: $600 to $1,600
It may interest you to know that the average cost of a new roof for consumers in the United States in 2024 is $10,000. That includes materials and labor.
FROM ONE OF OUR PARTNERS: Metal Roofs vs. Shingles: Which Should Roofers Recommend to Homeowners?
Ordering Roofing Materials Based on Roofing Squares
You will use your roofing square calculations, including pitch, to order roofing materials. You’ll also have to factor in extra waste, especially with more complex roofs.
The more complicated the roof, the more cuts you’ll have to make to accommodate protrusions, hips, etc. And all roofing jobs have some waste. Plus, you’ll want some extra material in case of error, material defects in a bundle, and the like.
Most property owners also want to keep a supply of extra roofing materials. They may have a storm where some shingles come loose. Having a few on hand makes it easier for them to match the roof should it need a small repair job.
You’ll notice we mentioned the word “bundle” above. Since asphalt shingles are the most common roofing material, it’s helpful to know they usually come in bundles.
When you purchase the shingles, you’ll want to ask how many bundles make up a roofing square. For instance, say you have a 20 square roof, and there are typically three bundles per square.
You’ll need, at minimum, 60 bundles to cover the roof. Add more in case of the contingencies described in the previous paragraphs. The industry rule of thumb is to add at least 10 to 15% waste for the average roof.
How To Make Doing Roofing Estimates Faster and Easier
Estimating the cost of a roofing job doesn’t have to be an arduous process. Remember, the faster you do it, the more time you can devote to billable tasks.
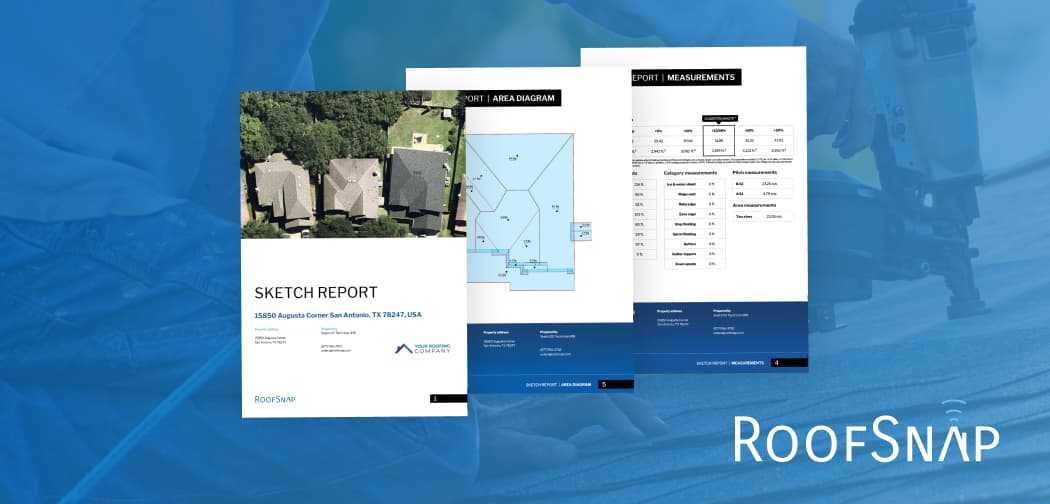
Software like RoofSnap makes creating estimates a breeze. You put in a few numbers, and the software generates a report you can use internally or share with clients.
The best software programs also let you generate contracts and create orders. This gives you one-stop project management.
FROM ONE OF OUR PARTNERS: How to Price a Roofing Job

The Significance of Accurate Measurements
Above, we discussed the benefits of using roofing squares for greater efficiency. Let’s take a moment to talk about the importance of accurate measurements, too.
One plus of accurate roof measurement is that you can give your clients a correct estimate for a job. If your measurements aren’t right, you could underestimate the cost of the job, leaving your business to eat the difference. That’s a big bite out of your profits.
On the other hand, measuring accuracy ensures you have sufficient materials handy for the job. If you miscalculate and don’t have enough supplies, you may wind up paying workers to do nothing while you fetch more shingles or insulation.
Or worse, what if the material you chose is in short supply and you didn’t get enough? You and your client could be forced to wait for the selection to be restocked. Or the customer could be stuck with a discontinued item and a mismatched roof.
Shortages also impact customer satisfaction. They make jobs drag out longer than the original given timeline. This may be reflected in your online customer reviews, which new customers read to decide whether or not to hire your company.
Remote software like RoofSnap provides 97% image accuracy, contributing to a job done right and greater overall customer satisfaction.
5 Roofing Square Tips You Can Use
Ready to start using roofing squares as your unit of measurement on the job? Follow these best practices to get the results you desire with your roofing projects:
- When taking initial measurements to calculate roof size, be sure to keep safety in mind. The old roof may not be in great shape, so watch for damage. Also, wear shoes with extra grip on the soles to avoid slipping. Anyone on the roof should also use fall protection precautions.
- Measure large sections of the roof first. Then, take measurements for small areas, like dormers. Add it all together to get the total roof area.
- Be prepared for unusual roof measurements. For instance, Victorian or Dutch gable houses can have more unique shapes that require careful measurement. These typically produce more waste—a factor included in all roofing estimates but higher with complicated roofs.
- Don’t forget to include extras when converting your roofing square calculations to an estimate. For instance, a steeply pitched roof will nearly always take more time to install. A roof on a very tall home might require scaffolding to reach the top.
- Leverage the latest technology to make generating estimates a quick task. Measurement services will help you get accurate measurements and create correct estimates. When you get your roofing estimates right, you protect your revenue and stay ahead of your competition. RoofSnap will even let you try theirs for free!
RELATED ARTICLE: Roof Estimating 101: How to Estimate a Roofing Job


