Roof decking is a vital component of every roof’s structural integrity. It also serves as a weather barrier. However, there are different types of decking to choose from depending on several factors. One type of decking may not fit every situation.
This article will dive into what you need to know about different types of roof decking. You’ll also learn how to know when roof decking needs replacement and get expert tips on the installation and repair of roof decking.
Importance of Roof Decking
As a professional roofer, you know that roof decking is vital to the support and integrity of a roof’s upper layers. It is the foundation on which the outer roofing shingles or tiles sit.
Without properly installed high-quality decking, a property can have multiple roof problems, including:
- Moisture and leaks
- Collapses
- Storm damage
- Shortened life span
The purpose of roof decking
Roof decking, also sometimes called roof sheathing, offers multiple functions and benefits:
- Stability for the outer layers of the roof
- Help with roof weight distribution
- Additional barrier against the elements
- Insulation to improve energy efficiency
- Ease of repairs and replacements
With roof decking in place, you can usually replace damaged shakes or shingles simply by attaching new ones in small sections. Even a heavy terracotta tile roof will be supported and not collapse on the structure below.
It’s important to note that roof decking is not the same thing as roof underlayment. The latter is an additional layer of material placed over the roof decking and under the outer-facing top layer. It provides more stability and offers yet another barrier from weather.
Types of Roof Decking
There are two basic categories of residential roof decking: sheet decking and plank decking. A third type, metal decking, is sometimes used in more industrial settings.
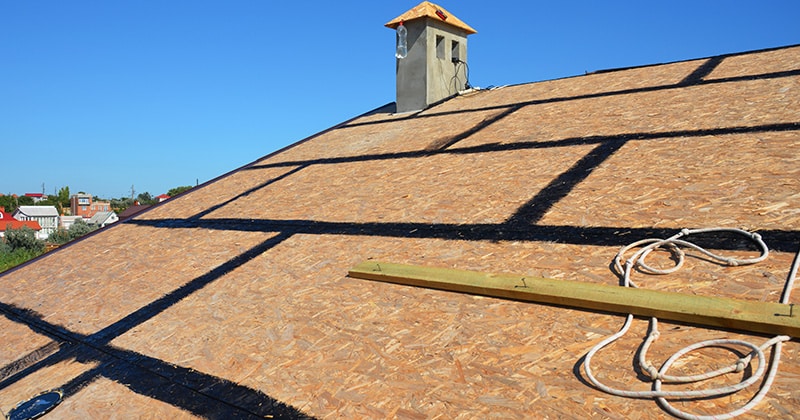
Sheet Decking
Sheet decking is made of flat sheets of wood composed of plywood or oriented strand board (OSB). Plywood is layers of wood pressed together in opposite directions for a solid appearance.
Typically, CDX (C-D Exposure 1) plywood is used for roof decking. It offers a more moisture-resistant front veneer than other types of plywood. It comes in various thicknesses and is easy to cut to size to fit unique shapes.
What is OSB? It stands for oriented strand board, made of compressed wood chips and strips in a seven-sixteenths inch sheet. OSB is both less expensive and more uniform than plywood. That’s why it has recently overtaken plywood in the roof decking market.
FROM ONE OF OUR PARTNERS: 9 Roofing Trends to Watch in 2023
Plank Decking
Plank decking is made of 1- by 6-foot or 1- by 8-foot rectangular boards. It’s similar to the way a backyard deck or hardwood floor is built. It’s less common than sheet decking. This is in part because it’s more labor-intensive to install. But it’s still used today, and you may see it in older homes.
Plank decking also leaves more opportunities for gaps between the planks. That’s another reason it’s less popular. Gaps can reduce stability and weather resistance, hence building codes that determine how small those gaps can be.
Metal Decking
For commercial properties, metal roof decking is frequently employed. It offers superior durability, strength, and fire resistance.
It is available in different finishes and thicknesses, allowing roofers to better customize the roof. Metal roof decking is particularly helpful when working with flat or minimally sloping roofs. Water drainage is more of a concern with these kinds of roofs.
FROM ONE OF OUR PARTNERS: How Much Does a Metal Roof Cost?
Considerations for Roof Decking Installation
So, you’ve chosen the best roof decking material for your job. Now, use these tips for the best roof decking installation:
Fastening Roof Decking
As you might imagine, fastening roof decking correctly is key to ensuring it functions properly. Without the right fastening, it could fall into the property below, cause leaks, or worse, blow off in severe weather. .
This is an especially important issue in regions that experience high winds and hurricanes. Updrafts beneath the eaves can put a great amount of stress on the decking. If it’s not properly fastened, it can lift off, taking the rest of the roof with it.
This leaves the home below completely exposed. You’ll often see this phenomenon in video footage of severe storms. It’s one of the reasons why damage from weather and climate disasters over the last 43 years is now over $2.6 trillion.
Therefore, you want to use the longest and widest diameter nails practical when fastening roof sheathing. Look for nails with a larger head, too.
This will help reduce roof lift-off in a storm. Additionally, spacing the nails closer together will provide further stability for the decking.
Use galvanized nails specifically designed for roofing. If applying them with a nail gun, rather than manually, use a gun that can accommodate the largest nails possible.
Utilize a pattern to ensure regular distribution. Always check the underside of the sheathing to look for any nails that may have missed the frame below. Renail any sections with missed nails.
Use a closer nail spacing pattern around the edge of the roof. This is where uplifting forces are greatest on the roof during a storm.
Roof Underlayment
Once the decking is in place, you can add the underlayment. The underlayment not only protects the decking, it can also offer insulating properties against excess heat and cold depending on the type used.
Proper installation of the underlayment will protect the decking. It will prevent swelling or rotting due to natural moisture that falls on the deck. Therefore, it’s vital to put it down correctly and not as an afterthought.
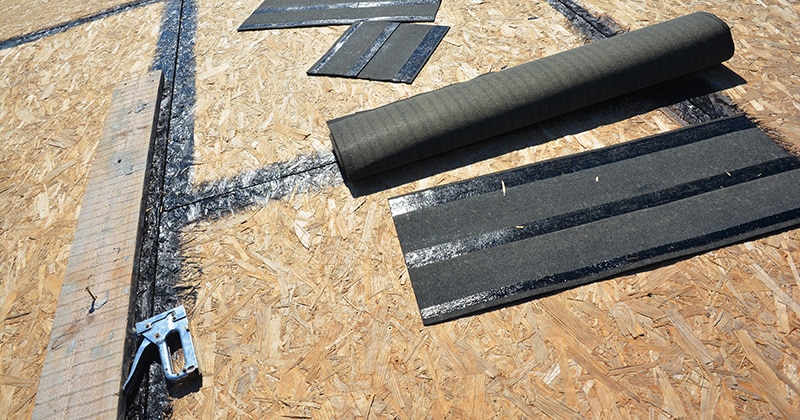
Asphalt-impregnated felt paper used to be the underlayment of choice. This is sometimes called asphalt-saturated felt paper. But it’s been replaced more and more by peel-and-stick underlayment. This material is stronger and provides better weather resistance.
It’s also much easier to install. Peel-and-stick roof underlayment comes in large rolls. You essentially apply it like you would contact paper on a cabinet shelf. There are no fasteners required in most circumstances.
One side is self-adhesive, which adheres to the decking. It can be cut to size, removing excess flaps once you have it in place.
Always make sure there is adequate attic ventilation when applying the underlayment. You want a good seal over the decking, but the roof must “breathe” to prevent moisture from being trapped.
Here are some tips for applying peel-and-stick underlayment:
- Use a chalk line to create a straight edge as a reference point.
- Cut the underlayment into sections to make it easier to work with.
- Use shorter sections if working alone versus with a partner or crew.
- Work in roughly 12- to 18-inch segments at a time for accuracy.
- Stick the top corner down first, and then smooth the segment downward.
- Overlap vertical segments by at least 6 inches.
- Overlap horizontal rows by at least 3-½ inches.
- Leave at least an inch to wrap over the bottom fascia to seal out the weather.
- Ensure building code compliance for safety and durability.
As mentioned previously, building codes exist for roof decking. They protect the property owner, their investment in the roof, and the home’s interior.
When you follow building codes for roof installation, it also protects your roofing or contracting business. You’ll be less vulnerable to costly bad reviews, chargebacks, and even liability lawsuits.
Be aware that roofing building codes can vary between locations. Always check your local building codes when performing a roofing job.
Also note that there is a national code since 2018 (R905.2.1) that dictates that asphalt shingles can only be applied to sheet decking, not plank decking. This is to ensure there is enough support below for the weight of the shingles.
In fact, any decking that is rotten or insufficient to hold the roof above must be replaced.
Additionally, since 2021, you are required to ensure proper spacing between all plank decking. Spaces larger than one-eighth of an inch are not permitted. The planking would have to be reapplied properly or replaced with sheet decking.
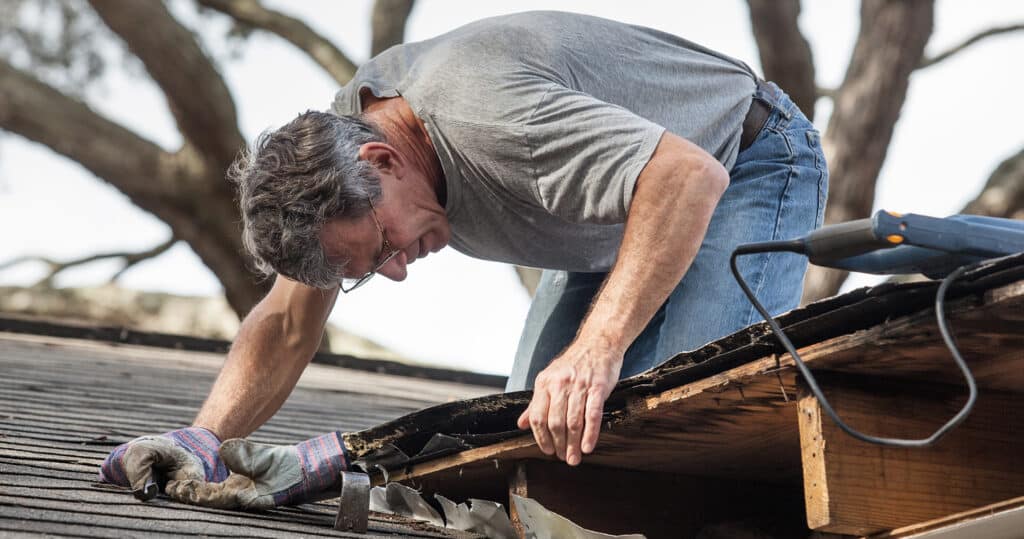
Maintaining and Repairing Roof Decking
As a professional roofing contractor, part of your job is to guide your clients on roofing maintenance and repairs. Advise your customers to inspect their roofs periodically. It’s good to do this after major storms or snowy winters.
Immediately fixing small problems can prevent more widespread and expensive damage later. Even the most carefully laid roof decking can become damaged by falling branches, large hail, ice dams, and other hazards.
Poor installation by a previous contractor can also result in decking problems. You may inherit this when you take on a new client.
Let your clients know to watch for these signs of damaged or rotting roof decking:
- Visible dips or sags in the roof
- Dark or discolored spots
- Signs of water damage on the ceiling inside
- Soft spots when walking on the roof
- Mold or mildew growth
- Loose roofing or decking materials
You might find old, rotted decking when installing a new roof. In all instances, the decking will have to be replaced.
The gold standard here is removing any rotten or damaged planks or sheets. Do not attempt to patch them. They may have more damage that you can’t see yet. And patching creates tiny cracks where more opportunities for moisture damage exist.
Instead, replace the entire section with new decking fastened as suggested above. You will also have to replace the underlayment as well.
FROM ONE OF OUR PARTNERS: How to Price a Roofing Job
4 Tips for Roofers Working with Roof Decking Materials
When installing roof decking, follow these tips for optimum outcomes:
You can install roof decking and underlayment by yourself. But it’s generally more efficient to work with a partner. When you complete roofing jobs faster, you make your clients happier. Plus, you can increase your revenue over the same period.
Encourage clients to use the best materials their budgets can afford. Spending a bit more on quality decking and underlayment will pay off in the long run with greater roof longevity.
Check and double-check measurements and quantities before starting a job. You don’t want to be caught short and leave your customer with an open roof.
Use roofing software like RoofSnap for greater speed and accuracy. It can help you give clients timely and precise estimates. And you can perform exact measurements to ensure you have all the materials you need right down to the quantity of your roofing nails.
RELATED ARTICLE: Roof Estimating 101: How to Estimate a Roofing Job
Need a better way to manage your roofing business? Try RoofSnap for free.